Americas Industrial Coatings

Categories
About Epoxy Floors Do It Yourself Industrial Epoxy Flooring

Why You Need a B&B Floor Polishing Specialist Today!

Maintaining the pristine condition of your floors is essential for enhancing the aesthetics and longevity of your space. This is where a B&B floor polishing specialist comes into play. B&B floor polishing is a meticulous process that ensures your floors not only look their best but also remain durable and resistant to wear and tear.

Whether it’s residential, commercial, or industrial flooring, the expertise of a B&B floor polishing specialist can make a significant difference. They utilize advanced techniques and equipment to achieve a high-gloss finish that adds value to your property. From removing stubborn stains and scratches to restoring the original shine of your floors, these specialists handle it all with precision.

Investing in professional floor polishing services can save you time and money in the long run. Instead of resorting to frequent replacements or repairs, regular polishing maintains the integrity of your flooring materials. Moreover, polished floors are easier to clean and maintain, providing a hygienic and appealing environment.

Call us today for a free quote and transform your floors with the expertise of a B&B floor polishing specialist. Visit our website at Americas Industrial Coatings to learn more about our services.

Benefits of Professional Floor Polishing

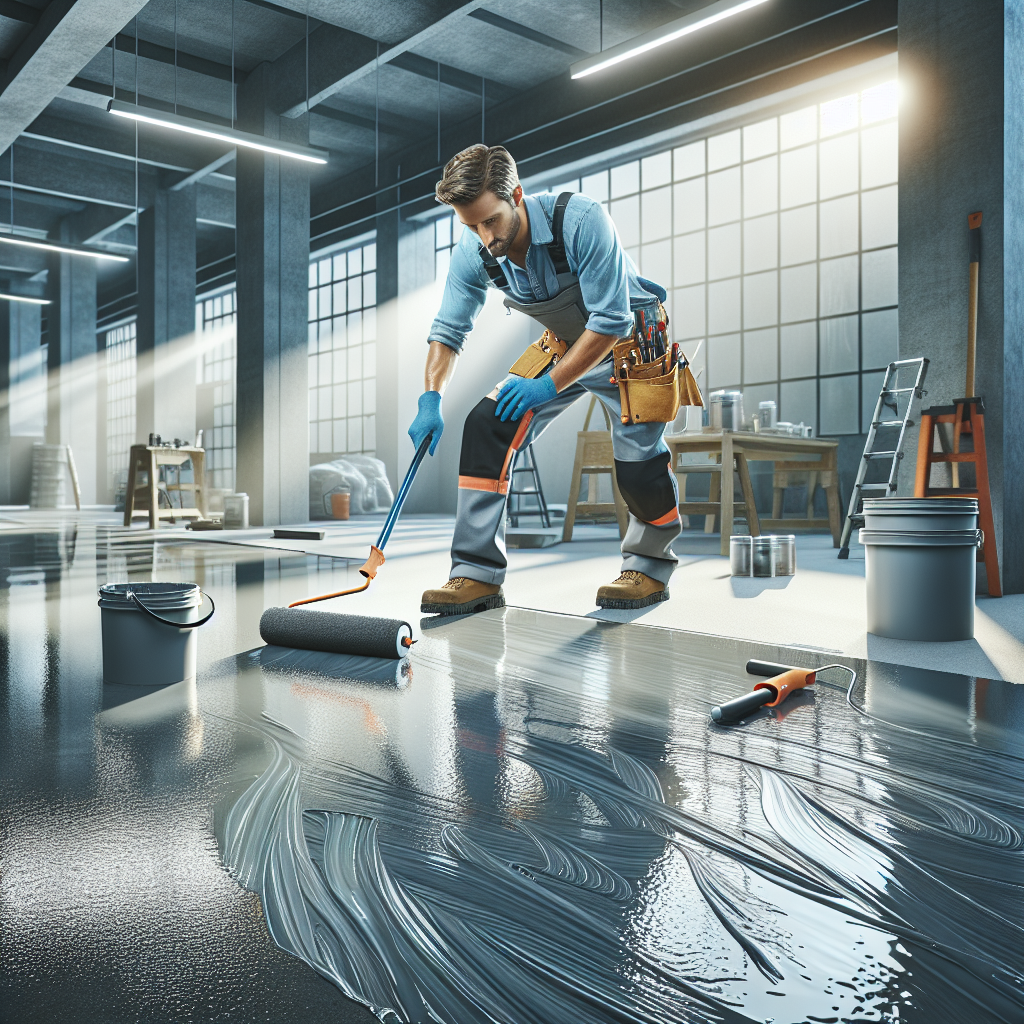
A professional floor polishing specialist meticulously polishing a high-gloss residential floor.

Professional floor polishing offers a multitude of benefits that go beyond mere aesthetics. When you enlist the services of a B&B floor polishing specialist, you are investing in the longevity and functionality of your flooring. Here are some key advantages:

  • Enhanced Durability: Polished floors are more resistant to scratches, stains, and general wear and tear. This means your floors will maintain their pristine condition for a longer period.
  • Improved Safety: A professionally polished floor can reduce the risk of slips and falls. The polishing process creates a smooth and even surface that minimizes hazards.
  • Cost-Efficiency: By extending the life of your floors, you can avoid costly replacements and repairs. Regular maintenance through polishing is a more economical option in the long run.
  • Easy Maintenance: Polished floors are easier to clean and maintain. Dust, dirt, and spills can be quickly wiped away, keeping your environment hygienic and attractive.
  • Enhanced Appearance: One of the most noticeable benefits is the stunning, glossy finish that professional polishing provides. This can significantly enhance the overall look of your space, making it more inviting and appealing.
  • Eco-Friendly: Polishing existing floors reduces the need for new materials, making it a more sustainable choice. Additionally, many polishing processes use environmentally friendly products.

By choosing professional floor polishing, you ensure that your floors are not only beautiful but also functional and long-lasting. This investment pays off in myriad ways, providing peace of mind and satisfaction.

Common Issues with DIY Floor Polishing

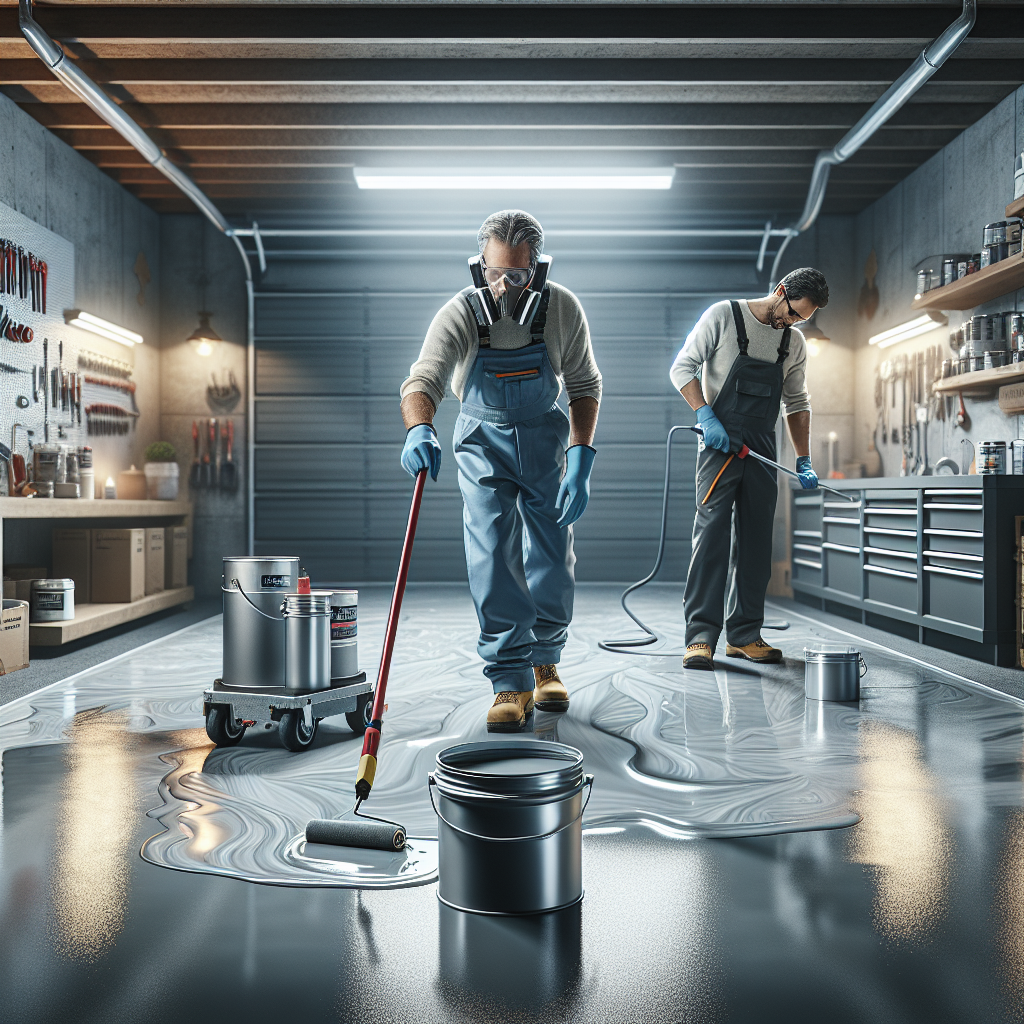
A B&B floor polishing specialist using modern equipment on a high-gloss residential floor.

While DIY floor polishing might seem like a cost-effective solution, it often comes with a host of challenges and pitfalls that can compromise the quality and longevity of your flooring. Here are some common issues associated with DIY floor polishing:

  • Inconsistent Finish: Achieving a uniform, glossy finish requires professional-grade equipment and expertise. Without these, you might end up with a patchy or uneven surface that detracts from your floor’s appearance.
  • Surface Damage: Incorrect use of polishing tools and products can damage the floor’s surface. Over-polishing or using the wrong type of polish can lead to scratches, discoloration, and other forms of damage.
  • Time-Consuming: DIY floor polishing is a labor-intensive process that can take up a significant amount of your time. Without experience, you might spend hours or even days trying to achieve satisfactory results.
  • Improper Tools and Materials: Professional-grade polishing tools and materials are often not accessible to the average consumer. Using subpar equipment can lead to inferior results and even potential hazards.
  • Health Risks: Polishing floors can generate dust and fumes that are harmful if inhaled. Professionals have the necessary protective gear and ventilation solutions to mitigate these risks.
  • Short-Lived Results: Without the right techniques and products, DIY polished floors may lose their shine quickly, requiring frequent re-polishing and maintenance.

In light of these issues, it’s clear that DIY floor polishing can often do more harm than good. The expertise, tools, and materials that professionals bring to the table ensure a high-quality finish that lasts, saving you time, money, and effort in the long run.

How B&B Specialists Ensure Quality

A B&B floor polishing specialist using equipment to polish a wooden floor in a modern room.

When it comes to floor polishing, B&B specialists bring a level of expertise and precision that is hard to match. Here are some of the key ways they ensure the highest quality results:

  • Professional-Grade Equipment: B&B specialists use state-of-the-art polishing machines and tools that are not readily available to the general public. These machines provide a consistent, high-quality finish that DIY methods simply cannot achieve.
  • Expert Knowledge: With years of experience under their belts, B&B specialists have a deep understanding of different types of flooring and the specific polishing techniques required for each. Whether it’s hardwood, concrete, or marble, they know how to bring out the best in your floors.
  • High-Quality Materials: Professionals use superior quality polishing compounds and sealants that enhance the durability and shine of your floors. These materials are often more effective and longer-lasting than those available to consumers.
  • Attention to Detail: B&B specialists are trained to pay meticulous attention to every aspect of the polishing process. From initial preparation to final touch-ups, they ensure that every inch of your floor is polished to perfection.
  • Tailored Solutions: Not all floors are the same, and B&B specialists provide customized solutions based on the specific needs of your flooring. They assess the condition of your floors and recommend the best course of action to achieve optimal results.
  • Safety Measures: Polishing floors can involve the use of chemicals and machinery that pose safety risks. B&B specialists are trained in proper safety protocols, ensuring a safe and efficient polishing process.
  • Long-Lasting Results: The combination of professional techniques, high-quality materials, and expert knowledge ensures that the polished finish lasts longer, reducing the need for frequent maintenance.

By entrusting your floor polishing needs to B&B specialists, you can be confident in receiving a superior, durable finish that enhances the beauty and longevity of your floors.

Choosing the Right Floor Polishing Specialist

Professional B&B floor polishing specialist working on a shiny wooden floor in a modern, clean environment.

Selecting the right floor polishing specialist is crucial for achieving the best results for your flooring. Here are some factors to consider when making your choice:

  • Experience and Expertise: Look for specialists with a proven track record and years of experience in the industry. Experienced professionals have encountered a variety of flooring types and conditions, making them better equipped to handle your specific needs.
  • Customer Reviews and Testimonials: Check online reviews and ask for references from past clients. Positive feedback and high ratings are indicators of reliable and high-quality service.
  • Certifications and Training: Ensure that the specialists have the necessary certifications and training. This indicates their commitment to maintaining industry standards and staying updated with the latest techniques and technologies.
  • Portfolio of Past Work: Ask to see examples of previous projects. A comprehensive portfolio can give you a clear idea of their capabilities and the quality of their work.
  • Range of Services: Choose a specialist who offers a wide range of services, including different types of floor polishing and restoration. This flexibility can be beneficial if you have multiple flooring types in your property.
  • Transparent Pricing: Look for specialists who provide clear and detailed estimates. Avoid those with vague pricing structures or hidden fees. Transparency in pricing reflects professionalism and integrity.
  • Insurance and Guarantees: Ensure the specialist is fully insured and offers guarantees on their work. This protects you from any potential damages or issues that may arise during the polishing process.
  • Environmental Considerations: Inquire about the products and methods used by the specialist. Opt for those who use eco-friendly materials and practices, minimizing the environmental impact.
  • Communication and Customer Service: Good communication is key to a successful project. Choose a specialist who is responsive, listens to your needs, and provides clear explanations and updates throughout the process.

By carefully evaluating these factors, you can select a floor polishing specialist who will deliver exceptional results, ensuring your floors remain beautiful and durable for years to come.

Maintaining Your Polished Floors

Once you’ve invested in professional floor polishing, it’s essential to maintain your polished floors to keep them looking their best and extend their lifespan. Here are some tips to help you preserve the shine and durability of your floors:

  • Regular Cleaning: Sweep or vacuum your floors daily to remove dust and debris that can cause scratches. Use a damp mop with a pH-neutral cleaner specifically designed for polished floors to maintain their luster without damaging the finish.
  • Protective Measures: Place rugs or mats at entryways to catch dirt and moisture before they reach your floors. Use furniture pads under the legs of chairs, tables, and other furniture to prevent scratches and dents.
  • Spill Management: Clean up spills immediately to prevent staining or damage. Use a soft cloth or mop to blot the spill and avoid abrasive cleaning tools that can harm the polished surface.
  • Avoid Harsh Chemicals: Steer clear of acidic or alkaline cleaners, as they can dull or damage your polished floors. Stick to products recommended by your floor polishing specialist.
  • Regular Polishing: Depending on the level of foot traffic, schedule regular polishing to maintain the shine and protective layer of your floors. Consult with your floor polishing specialist for the ideal frequency of re-polishing.
  • Humidity Control: Maintain a consistent indoor humidity level to prevent your floors from expanding or contracting, which can lead to cracks or other damage.
  • Professional Inspections: Periodically have your floors inspected by a professional to identify and address any issues early on. This proactive approach can save you time and money on extensive repairs in the future.

By following these maintenance tips, you can ensure that your polished floors remain stunning and durable for years to come. If you need expert advice or professional floor maintenance services, call us today for a free quote. Our team at Americas Industrial Coatings in Fort Lauderdale is here to help you keep your floors in pristine condition.

Categories
Do It Yourself Epoxy Garage Floors Garage Design

Learn How to Professionally Epoxy a Garage Floor Today!

When it comes to enhancing the durability and aesthetics of your garage floor, epoxy flooring stands out as a top choice. Epoxy garage floors are not only visually appealing but also offer unmatched strength and resistance to spills, stains, and heavy impact. Whether you’re a homeowner looking to elevate your garage’s look or a business owner aiming for a polished, professional space, learning how to professionally epoxy a garage floor can be incredibly beneficial.

Epoxy is a thermosetting resin that is applied as a coating to concrete floors. Once cured, it forms a hard, durable surface that can withstand significant wear and tear. This makes it an excellent option for garages, workshops, and other high-traffic areas. However, achieving a professional finish requires careful preparation, application, and attention to detail.

In this guide, we’ll walk you through the steps to professionally epoxy a garage floor, from initial prep work to the final topcoat. By the end, you’ll have the knowledge and confidence to transform your garage into a space that is both functional and stylish.

Ready to get started? Call Us Today for a Free Quote and let our experts help you achieve the perfect epoxy garage floor.

Essential Tools and Materials

Pristine garage floor with a glossy epoxy coating in a well-organized garage.

Before you embark on your journey to professionally epoxy a garage floor, it’s crucial to gather all the necessary tools and materials. Having everything on hand will ensure a smooth and efficient process. Here’s a comprehensive list of what you’ll need:

  • Epoxy Resin and Hardener: The core components of your epoxy flooring system. Make sure to get a high-quality product suitable for garage floors.
  • Concrete Cleaner/Degreaser: Essential for removing any oil, grease, or dirt from the concrete surface.
  • Etching Solution: This helps open up the pores of the concrete, ensuring better adhesion of the epoxy.
  • Concrete Patch Compound: For repairing any cracks or imperfections in the concrete surface.
  • Painter’s Tape: Useful for marking off areas and ensuring clean edges.
  • Plastic Sheeting: To protect walls and other surfaces from accidental spills and splashes.
  • Paint Rollers and Brushes: High-quality rollers and brushes will help you apply the epoxy evenly.
  • Mixing Buckets and Stir Sticks: For properly mixing the epoxy resin and hardener.
  • Protective Gear: Gloves, safety goggles, and a respirator mask are essential for your safety.
  • Squeegees: Useful for spreading the epoxy evenly across the floor.
  • Spike Shoes: These allow you to walk on the wet epoxy without leaving marks.
  • Non-Slip Additives: If you want to add texture to your floor for extra traction, these are a must.

Having these tools and materials ready will set the stage for a successful epoxy application, helping you achieve a professional and durable finish for your garage floor.

Preparing the Garage Floor Surface

Freshly epoxy-coated garage floor in a clean and organized residential garage.

Proper preparation is the key to a successful epoxy floor application. Ensuring that your garage floor surface is adequately prepared will not only enhance the bond of the epoxy but also prolong its durability. Here’s a step-by-step guide to preparing your garage floor surface:

  1. Clear the Area: Start by removing all items from the garage. This includes cars, tools, and any other stored items. A completely empty space will allow you to work more efficiently.
  2. Thorough Cleaning: Sweep and vacuum the floor to remove dirt, dust, and debris. Follow this by scrubbing the floor with a concrete cleaner or degreaser to eliminate any oil stains or grease. Rinse thoroughly and let it dry completely.
  3. Inspect for Damage: Check the floor for any cracks, holes, or uneven spots. Use a concrete patch compound to repair these imperfections. Allow the patched areas to cure as per the manufacturer’s instructions.
  4. Etching the Concrete: Apply an etching solution to the floor to open up the concrete’s pores. This step is crucial for enhancing the epoxy’s adhesion. Follow the instructions on the etching solution’s label carefully. Rinse the floor thoroughly after etching and let it dry completely.
  5. Moisture Test: Perform a moisture test to ensure that the concrete is dry. Tape a plastic sheet to the floor and leave it for 24 hours. If there is moisture under the plastic, the floor needs more time to dry or may require a moisture barrier.
  6. Final Clean: Give the floor one last vacuum to ensure it is free of dust and debris. This will help the epoxy adhere better and result in a smoother finish.

By meticulously preparing your garage floor surface, you lay a strong foundation for the epoxy coating, ensuring a professional and long-lasting finish.

Applying the Epoxy Coating

With the garage floor surface properly prepared, it’s time to move on to applying the epoxy coating. This process requires attention to detail and precise execution to achieve a professional-grade finish. Follow these steps to ensure a successful application:

  1. Mixing the Epoxy: Epoxy typically comes in two parts: resin and hardener. Follow the manufacturer’s instructions for mixing these components. Use a paddle mixer attached to a drill for thorough blending. Be mindful of the pot life, which is the time you have to apply the epoxy before it starts to harden.
  2. Cutting In: Start by applying the epoxy along the edges of the floor using a brush. This technique, known as cutting in, ensures that all areas, including corners and edges, are covered.
  3. Rolling the Epoxy: Pour the mixed epoxy onto the floor in small sections. Use a lint-free roller to spread the epoxy evenly across the surface. Work in small sections to maintain a wet edge, which helps prevent lap marks. Roll in a ‘W’ pattern for even coverage.
  4. Applying a Second Coat: Depending on the manufacturer’s recommendations and the desired thickness, you may need to apply a second coat of epoxy. Ensure the first coat is completely dry before applying the second. This usually takes about 12 to 24 hours.
  5. Adding Decorative Flakes: If you want to add decorative flakes to your floor, sprinkle them onto the wet epoxy immediately after rolling. This will help the flakes adhere properly. Distribute them evenly for a consistent look.
  6. Allowing to Cure: After the final coat is applied, allow the epoxy to cure. This process can take from 24 to 72 hours, depending on the product and environmental conditions. Avoid walking on the floor until it is fully cured to prevent damage.

Applying the epoxy coating with precision will result in a durable, visually appealing finish that enhances both the functionality and aesthetic of your garage floor.

Curing and Finishing the Epoxy Floor

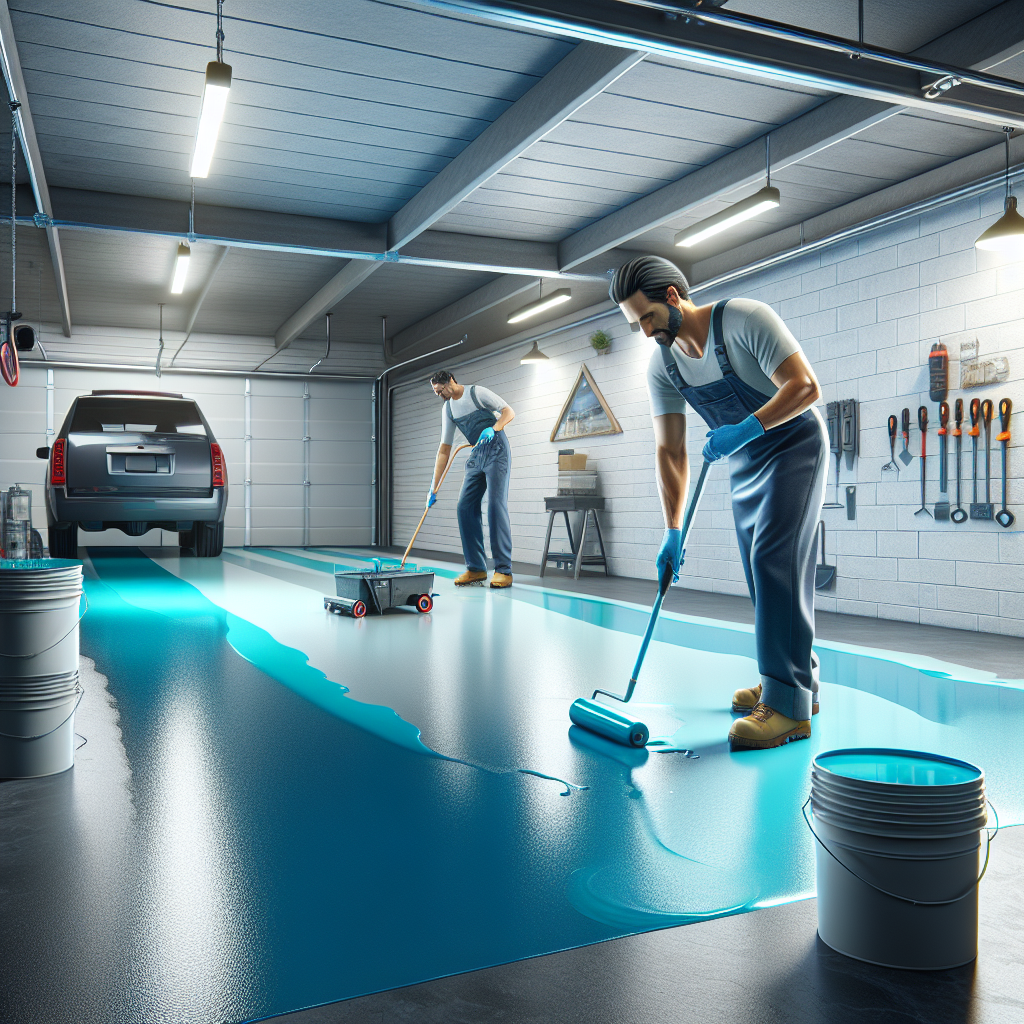
Garage floor with a fresh epoxy coating, showcasing its smooth and glossy finish, with organized tools and a parked car in the background.

Once the epoxy coating has been applied, the next critical step is curing and finishing the floor. Proper curing ensures that the epoxy achieves its maximum durability and longevity. Here are the steps to follow:

  1. Initial Curing Phase: After applying the final coat of epoxy, allow it to cure undisturbed. This initial phase typically lasts between 12 to 24 hours. During this time, avoid any foot traffic on the surface to prevent imperfections.
  2. Full Cure Time: For the epoxy to reach its full strength, it must cure completely. This process can take up to 72 hours, depending on the product specifications and environmental conditions such as temperature and humidity. It’s crucial to keep the area ventilated and maintain a stable temperature for optimal curing.
  3. Post-Cure Inspection: Once the epoxy has fully cured, inspect the surface for any imperfections or areas that may need touch-ups. Small bubbles or uneven spots can be sanded down and re-coated if necessary. A thorough inspection ensures a flawless finish.
  4. Applying a Topcoat: For added protection and a glossy finish, consider applying a clear topcoat. This additional layer can enhance the durability of the epoxy and protect it from UV rays, stains, and abrasions. Follow the manufacturer’s instructions for the topcoat application.
  5. Maintenance Tips: After the curing process is complete, maintaining your epoxy floor is essential for its longevity. Regularly sweep and mop the floor to keep it clean. Avoid using harsh chemicals or abrasive cleaning tools that can damage the epoxy surface. Placing mats at entry points can also help minimize dirt and debris.

By following these steps, you can ensure that your epoxy floor not only looks great but also stands up to the wear and tear of daily use. A properly cured and finished epoxy floor will provide years of low-maintenance, high-performance service.

Maintenance Tips for Epoxy Floors

A realistic image of a professionally done epoxy garage floor with a glossy finish in a well-organized garage.

Maintaining your newly installed epoxy floor is crucial to ensure its longevity and pristine appearance. While epoxy floors are incredibly durable and resistant to many common forms of damage, they still require regular care to stay in top condition. Here are some essential maintenance tips:

  1. Regular Cleaning: Sweep or vacuum the floor regularly to remove dirt and debris. Use a soft-bristle broom or a dust mop to prevent scratching the surface. For a deeper clean, use a mop with a mild detergent mixed with water.
  2. Avoid Harsh Chemicals: Epoxy floors are resistant to many chemicals, but harsh or abrasive cleaning agents can still damage the surface. Stick to pH-neutral cleaners and avoid products containing bleach or ammonia.
  3. Protective Measures: Place mats at entry points to trap dirt and moisture before it gets onto the epoxy floor. Use furniture pads under heavy objects to prevent scratches and dents. For areas with high traffic or heavy loads, consider adding extra layers of protection, such as a clear topcoat.
  4. Spill Management: Clean up spills immediately to prevent staining and maintain the floor’s appearance. While epoxy is resistant to many liquids, prolonged exposure can still cause damage.
  5. Periodic Inspection: Regularly inspect the floor for signs of wear or damage. Address small issues promptly to prevent them from becoming larger problems. Touch up minor scratches or chips with an epoxy repair kit.
  6. Reapplication: Depending on the amount of traffic your epoxy floor endures, you may need to reapply the topcoat every few years to maintain its protective qualities. Follow the manufacturer’s recommendations for reapplication intervals.

By following these maintenance tips, you can keep your epoxy floor looking like new for years to come. Proper care and attention will ensure that the floor remains a durable and attractive feature in your space.

Call Us Today for a Free Quote and let Americas Industrial Coatings help you achieve a professional and long-lasting epoxy floor!

Categories
About Epoxy Floors Do It Yourself

Residential Epoxy Floors Installation Process in Broward County

When it comes to enhancing the aesthetic and functional appeal of your home, residential epoxy floors offer an exceptional solution. These floors are renowned for their durability, stylish appearance, and ease of maintenance, making them an increasingly popular choice among homeowners in Broward County. Whether you’re looking to revamp your garage, basement, or any living space, epoxy flooring provides a seamless and attractive finish that stands the test of time.

Epoxy floors are created by combining resin and hardener, resulting in a rigid plastic material that bonds exceptionally well to concrete surfaces. This unique composition not only creates a high-gloss and visually appealing floor but also offers impressive resistance to stains, chemicals, and heavy foot traffic. Given the humid climate of Broward County, epoxy floors are particularly beneficial as they are resistant to moisture and can prevent mold and mildew growth, ensuring a healthier living environment.

At Americas Industrial Coatings in Fort Lauderdale, we specialize in providing expert epoxy floor installation tailored to meet the specific needs of residential properties in Broward County. Our team of skilled professionals is dedicated to delivering high-quality services that transform your floors into beautiful, long-lasting surfaces. Call us today for a free quote and take the first step towards redefining your home’s flooring.

Visit us at https://americasindustrialcoatings.com to learn more about our services and how we can help you achieve the perfect epoxy floor for your home.


Benefits of Epoxy Flooring for Homes

A realistic depiction of a glossy epoxy floor in a modern living room.

Choosing epoxy flooring for your home comes with a multitude of benefits that extend beyond mere aesthetics. One of the primary advantages is its remarkable durability. Epoxy floors are incredibly tough and can withstand significant wear and tear, making them ideal for high-traffic areas such as garages, basements, and even kitchens. This durability ensures that your flooring investment will last for many years without the need for frequent repairs or replacements.

Another significant benefit is the ease of maintenance. Epoxy floors are non-porous and resistant to spills, stains, and chemicals, making them exceptionally easy to clean. A simple mop or sweep is often all that’s needed to keep the surface looking pristine. This low-maintenance feature is particularly advantageous for busy households where time is a premium.

Beyond functionality, epoxy flooring adds a touch of elegance to any space. Available in a variety of colors, patterns, and finishes, epoxy can be customized to match your home’s interior design. Whether you prefer a sleek, high-gloss finish or a more subtle, matte look, epoxy flooring can be tailored to suit your aesthetic preferences.

Epoxy flooring also offers excellent resistance to moisture, which is a crucial factor in the humid climate of Broward County. This moisture resistance helps prevent issues like mold and mildew, contributing to a healthier indoor environment. Additionally, epoxy floors are slip-resistant, providing an added layer of safety for your family.

In summary, epoxy flooring combines durability, low maintenance, aesthetic versatility, and safety, making it a highly beneficial option for homeowners looking to enhance their living spaces.


Preparation Steps for Epoxy Installation

A realistic depiction of a high-quality epoxy floor in a modern interior setting.

Proper preparation is crucial for a successful residential epoxy floors installation process in Broward County. The first step involves thoroughly cleaning the existing floor surface. This cleaning process removes all dirt, grease, and debris that could interfere with the epoxy’s adhesion. Often, a degreasing solution is used to ensure that the surface is completely free of contaminants.

Once the floor is clean, the next step is to repair any cracks or imperfections in the concrete. Cracks and holes are filled with an epoxy-based filler, which is then smoothed out to create a level surface. This step is essential because any inconsistencies can affect the final appearance and durability of the epoxy floor.

After repairs, the floor must be etched or ground to create a rough texture. This etching process involves using a diamond grinder or acid etching solution to open up the concrete’s pores. This rough texture enhances the epoxy’s ability to bond with the concrete, ensuring a stronger and more durable finish.

Next, the floor must be thoroughly vacuumed to remove all dust and debris generated during the etching process. A clean, dust-free surface is critical for optimal adhesion of the epoxy coating.

Finally, a primer is applied to the prepared surface. The primer acts as a base coat that improves the adhesion of the subsequent epoxy layers. It also helps to seal the concrete, preventing any moisture from seeping through and causing issues down the line. Once the primer is dry, the floor is ready for the application of the epoxy coating.

By following these meticulous preparation steps, you ensure a smooth and long-lasting epoxy floor that will stand the test of time.


Detailed Epoxy Installation Process

A realistic image of an epoxy floor in a modern interior setting.

Once the preparation steps are completed, the actual residential epoxy floors installation process in Broward County can begin. The first phase involves mixing the epoxy resin and hardener. These two components must be thoroughly mixed to ensure a consistent blend that will cure properly. It’s essential to follow the manufacturer’s instructions regarding the mixing ratios and mixing time.

After mixing, the first coat of epoxy, known as the base coat, is applied to the floor. This coat is typically spread using a roller or squeegee, ensuring an even and smooth application. The base coat serves as the foundation for the subsequent layers, providing the necessary adhesion and coverage.

While the base coat is still wet, decorative elements such as colored flakes or quartz can be added. These additives not only enhance the aesthetic appeal of the floor but also provide additional texture and slip resistance. The flakes are broadcast evenly across the wet epoxy to ensure consistent coverage.

Once the base coat and any decorative elements have been applied, the floor must be allowed to cure. The curing time can vary depending on the specific epoxy product used and the ambient conditions, such as temperature and humidity. Typically, this process can take anywhere from 12 to 24 hours.

After the base coat has cured, any excess decorative flakes are removed, and the surface is lightly sanded to ensure a smooth finish. This step is followed by the application of a topcoat. The topcoat provides additional durability and a glossy finish, sealing in the decorative elements and protecting the floor from wear and tear.

Finally, the topcoat is allowed to cure, completing the installation process. The result is a beautiful, durable, and easy-to-maintain epoxy floor that will enhance the value and appearance of any residential space.


Post-Installation Care and Maintenance

After the successful completion of the residential epoxy floor installation process in Broward County, it’s crucial to follow proper post-installation care and maintenance to ensure the longevity and pristine condition of your new flooring. Initially, avoid heavy traffic and placing objects on the floor for at least 24-48 hours to allow the epoxy to fully cure and harden.

Routine maintenance is straightforward and involves regular cleaning to keep the floor looking its best. Sweep or vacuum the floor to remove dirt and debris, which can cause scratches and wear over time. For deeper cleaning, use a mop and a mixture of water with a mild, non-abrasive detergent. Avoid harsh chemicals and abrasive cleaning tools as they can damage the epoxy finish.

For spills and stains, it’s best to address them promptly. Wipe up any liquid spills immediately to prevent them from becoming permanent stains. For tougher stains, a gentle scrubbing with a soft-bristle brush and a mild cleaner should suffice. Always rinse the area thoroughly with clean water to remove any residue.

To maintain the floor’s shine and durability, consider applying a fresh topcoat every few years. This will rejuvenate the finish and provide added protection against wear and tear. Depending on the level of traffic and use, some homeowners may find this necessary more or less frequently.

In addition to regular cleaning, it’s advisable to use protective pads under furniture legs and heavy objects to prevent scratches and dents. Avoid dragging heavy items across the floor, as this can cause significant damage. Instead, lift and carry items or use a dolly with soft wheels.

By following these simple care and maintenance guidelines, you can ensure that your epoxy floor remains beautiful and functional for many years to come, providing a stylish and durable solution for your home.


Choosing the Right Epoxy Flooring Contractor

A realistic image of a glossy, seamless epoxy floor in an indoor setting.

Selecting the right contractor for your residential epoxy floor installation process in Broward County is a crucial step to ensure a successful and long-lasting result. The right contractor will not only have the necessary expertise and experience but will also provide excellent customer service and quality assurance.

When evaluating potential contractors, it’s important to consider their experience and track record. Look for contractors who have been in the business for several years and have a portfolio of completed projects. This demonstrates their capability to handle various types of installations and their commitment to quality workmanship.

References and reviews from past clients can also provide valuable insights into the contractor’s reliability and professionalism. Check online reviews and ask the contractor for references you can contact. Positive feedback from satisfied customers is a good indicator of a trustworthy contractor.

Another critical factor is the contractor’s knowledge of different epoxy flooring systems and their ability to recommend the best option for your specific needs. They should be able to explain the benefits and limitations of each type of epoxy flooring and help you make an informed decision.

Ensure that the contractor is properly licensed and insured. This not only protects you from potential liabilities but also indicates that the contractor adheres to industry standards and regulations. Ask to see their license and insurance certificates before moving forward with any agreement.

Clear communication is key to a successful project. Choose a contractor who is responsive and willing to answer your questions. They should provide a detailed written estimate that outlines the scope of work, materials to be used, timeline, and costs involved. This transparency helps avoid misunderstandings and ensures that both parties are on the same page.

Lastly, consider the warranty and aftercare services offered by the contractor. A reputable contractor will stand by their work and offer a warranty that covers both materials and labor. They should also provide guidance on post-installation care and maintenance to help you get the most out of your new epoxy floor.

Choosing the right epoxy flooring contractor can make all the difference in the success of your project. Call Us Today for a Free Quote and let our team of experts at Americas Industrial Coatings transform your space with high-quality, durable epoxy flooring.


Categories
Do It Yourself Epoxy Garage Floors Garage Design

Top Epoxy Garage Floors Cleaning Tips in Broward County

Epoxy garage floors are a popular choice among homeowners in Broward County due to their durability, aesthetic appeal, and ease of maintenance. However, to maintain their pristine condition and extend their lifespan, it is essential to follow proper cleaning techniques. In this article, we will provide you with a comprehensive guide on the top epoxy garage floor cleaning tips in Broward County. Whether you are dealing with minor spills or stubborn stains, our expert advice will help you keep your floors looking as good as new.

Before delving into specific cleaning methods, it is crucial to understand the nature of epoxy floors. Epoxy is a combination of resins and hardeners that create a tough, protective coating over concrete surfaces. This coating is resistant to chemicals, stains, and abrasions, making it an ideal choice for garage floors. However, while epoxy floors are low-maintenance, they are not maintenance-free. Regular cleaning is necessary to prevent the build-up of dirt, grime, and other contaminants that can compromise the floor’s appearance and integrity.

By following our cleaning tips, you can ensure that your epoxy garage floors remain in top condition for years to come. From choosing the right cleaning products to mastering the correct techniques, we cover everything you need to know. So, let’s get started on the journey to spotless and long-lasting epoxy garage floors!

Call Us Today for a Free Quote


Why Clean Epoxy Garage Floors Regularly

A realistic image of an epoxy garage floor being cleaned.

Regular cleaning of epoxy garage floors is essential not only for maintaining their aesthetic appeal but also for ensuring their longevity and performance. One of the primary reasons to clean epoxy garage floors frequently is to prevent the accumulation of dirt, dust, and debris. Over time, these particles can cause micro-abrasions on the epoxy surface, leading to a dull and worn-out appearance.

Another significant reason to clean epoxy floors regularly is to avoid staining. Although epoxy is highly resistant to stains, certain substances like oil, grease, and chemicals can leave marks if left uncleaned for extended periods. Prompt removal of spills and stains will help preserve the floor’s glossy finish and prevent discoloration.

Regular cleaning also helps in maintaining a safe and hygienic environment. Garages often harbor various contaminants, including automotive fluids, pesticides, and other hazardous materials. By keeping the floor clean, you reduce the risk of accidents and promote a healthier space for your family and pets.

Moreover, consistent cleaning allows for early detection of potential issues such as cracks, chips, or peeling. Addressing these problems promptly can prevent further damage and costly repairs. In summary, regular cleaning of epoxy garage floors not only enhances their visual appeal but also contributes to their durability and safety. By incorporating simple cleaning routines into your maintenance schedule, you can enjoy the benefits of beautiful and long-lasting epoxy floors.


Essential Cleaning Supplies for Epoxy Floors

To ensure your epoxy garage floors remain in pristine condition, it’s crucial to use the right cleaning supplies. The following essential items will help you maintain and protect your floors:

  • Broom and Dust Mop: Regular sweeping with a soft-bristle broom or dust mop helps remove loose dirt and debris, preventing scratches and abrasions on the epoxy surface.
  • Microfiber Mop: A microfiber mop is ideal for wet cleaning. Its gentle fibers effectively pick up dirt and grime without damaging the epoxy coating.
  • pH-Neutral Cleaner: Using a pH-neutral cleaner is essential to avoid damaging the epoxy finish. Harsh chemicals and acidic or alkaline cleaners can deteriorate the surface, so opt for a mild detergent specifically designed for epoxy floors.
  • Bucket: A sturdy bucket is needed for mixing your cleaner with water. Ensure it’s large enough to accommodate your mop and allow for easy rinsing.
  • Soft Cloths or Sponges: For spot cleaning and tackling stubborn stains, soft cloths or non-abrasive sponges are perfect. They allow you to clean specific areas without scratching the epoxy.
  • Wet/Dry Vacuum: A wet/dry vacuum can be highly effective for removing excess water after mopping, preventing water spots and streaks.
  • Protective Gear: Don’t forget to use gloves and possibly knee pads to protect yourself while cleaning, especially when dealing with chemicals or spending extended periods on your knees.

By equipping yourself with these essential cleaning supplies, you can ensure that your epoxy garage floors remain clean, shiny, and durable. Regular maintenance with the right tools will help you preserve the beauty and functionality of your floors for years to come.


Step-by-Step Cleaning Process for Epoxy Floors

Realistic image of cleaning an epoxy garage floor.

Maintaining the beauty and longevity of your epoxy garage floors in Broward County is easy when you follow a systematic cleaning process. Here’s a step-by-step guide to help you achieve spotless and well-maintained floors:

  1. Remove Loose Debris: Start by sweeping the floor with a soft-bristle broom or using a dust mop to eliminate loose dirt, dust, and debris. This step prevents scratching during the wet cleaning process.
  2. Prepare Cleaning Solution: Fill a bucket with warm water and add a pH-neutral cleaner according to the manufacturer’s instructions. Avoid using acidic or alkaline cleaners as they can damage the epoxy surface.
  3. Mop the Floor: Dip a microfiber mop into the cleaning solution, wring out excess water, and mop the floor in a systematic pattern. Ensure that the mop is damp, not soaking wet, to avoid excessive water on the floor.
  4. Spot Clean Stubborn Stains: For tough stains or spills, use a soft cloth or a non-abrasive sponge with the cleaning solution. Gently scrub the stained area until it’s clean, being careful not to scratch the epoxy coating.
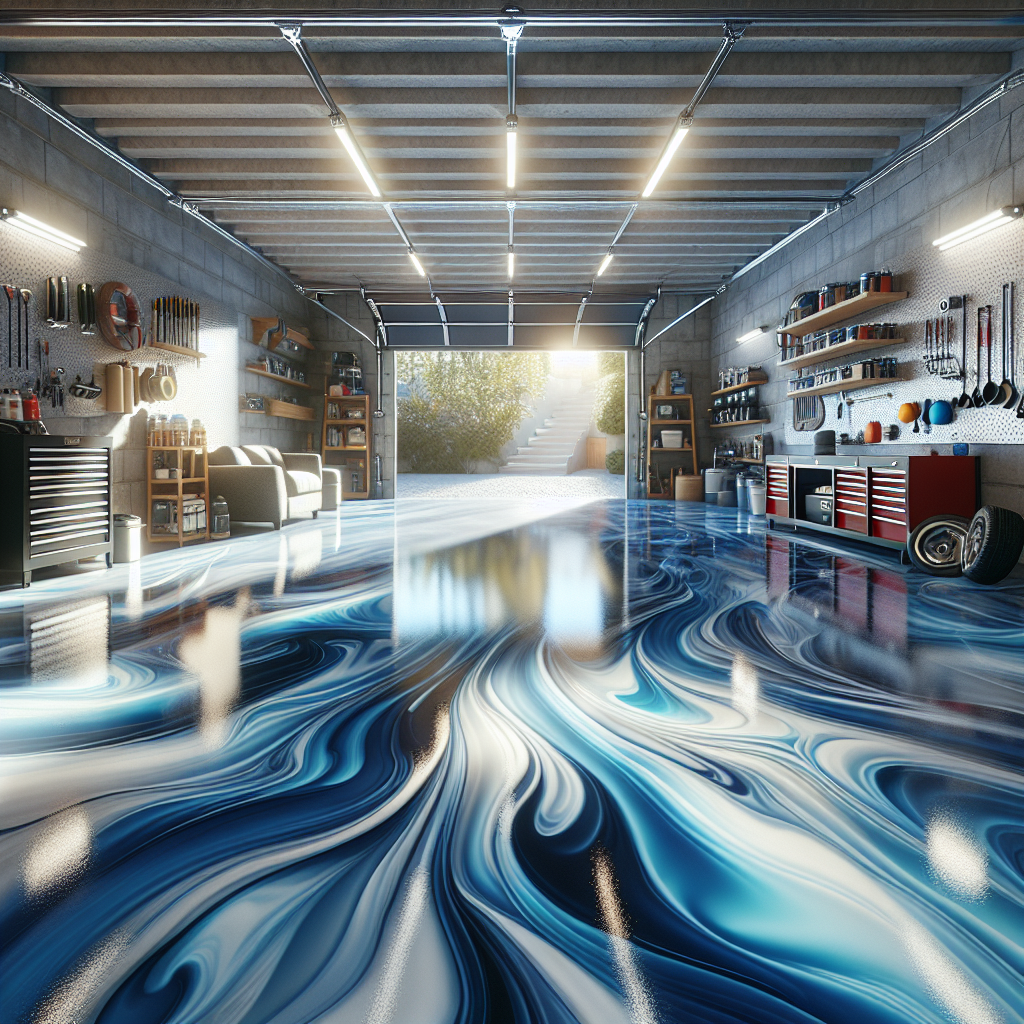
  5. Rinse the Floor: Once the entire floor is mopped, rinse the mop in clean water and go over the floor again to remove any remaining cleaning solution. This step ensures there are no residues left behind that could dull the floor’s shine.
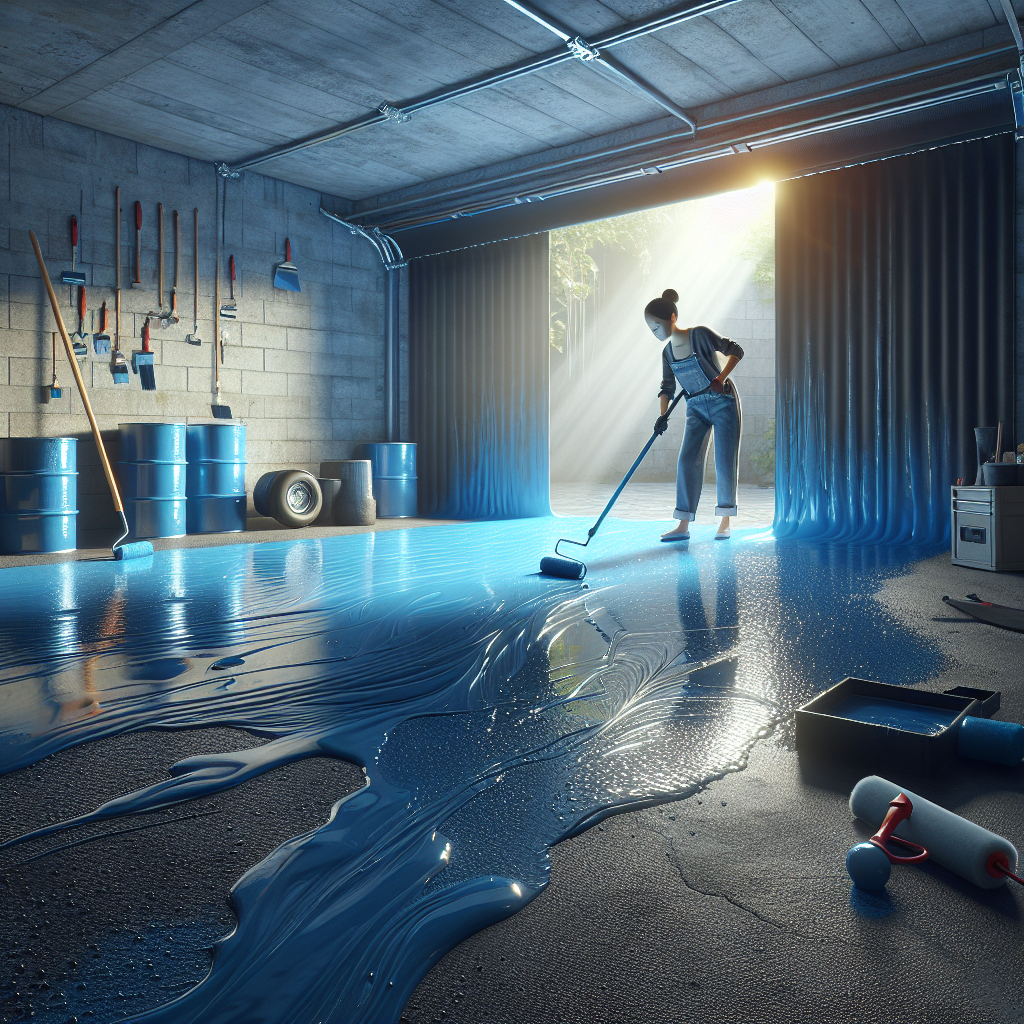
  6. Dry the Floor: Use a wet/dry vacuum to remove excess water from the floor. Alternatively, you can use dry microfiber cloths or towels to wipe down the floor, ensuring it’s completely dry to prevent water spots and streaks.
  7. Regular Maintenance: To keep your epoxy floors looking their best, establish a regular cleaning schedule. Depending on the level of foot traffic and usage, aim to sweep daily and mop at least once a week.

By following this step-by-step cleaning process, you can maintain the pristine condition of your epoxy garage floors, ensuring they remain attractive and durable for years to come. Regular and proper cleaning not only enhances the appearance but also extends the life of your epoxy floors.


Common Mistakes to Avoid When Cleaning

A clean epoxy garage floor with a shiny and polished surface.

While cleaning your epoxy garage floors might seem straightforward, there are several common mistakes that can inadvertently damage the surface. Knowing what to avoid can help you maintain the integrity and appearance of your floors. Here are some of the most common cleaning mistakes to steer clear of:

  • Using Harsh Chemicals: Avoid using acidic or alkaline cleaners, such as vinegar, ammonia, or bleach. These substances can degrade the epoxy coating, leading to discoloration and reduced durability. Always opt for pH-neutral cleaners specifically designed for epoxy floors.
  • Scrubbing with Abrasive Tools: Scrubbing pads, steel wool, and stiff-bristle brushes can scratch and damage the glossy finish of your epoxy floors. Instead, use soft cloths, microfiber mops, or non-abrasive sponges to clean the surface gently.
  • Excessive Water Usage: Using too much water during the cleaning process can cause the epoxy to swell or peel over time. Ensure your mop is damp, not soaking wet, and always dry the floor thoroughly after cleaning.
  • Neglecting Spills: Allowing spills, especially from oil, chemicals, or other staining substances, to sit on the floor for too long can cause permanent stains and damage. Promptly clean up any spills with a soft cloth and an appropriate cleaner.
  • Skipping Regular Maintenance: Irregular cleaning can lead to the buildup of dirt and grime, making it harder to clean and potentially damaging the epoxy surface. Establish a regular cleaning routine to keep your floors in optimal condition.
  • Ignoring Manufacturer’s Instructions: Always follow the epoxy floor manufacturer’s guidelines for cleaning and maintenance. Using products or methods not recommended by the manufacturer can void warranties and cause damage.

By avoiding these common mistakes, you can preserve the beauty and functionality of your epoxy garage floors in Broward County. Proper care and attention to detail will ensure that your floors remain a valuable and attractive feature of your space for years to come.


Professional Cleaning Services in Broward County

A realistic image of a clean epoxy garage floor being mopped, highlighting its shiny surface.

While maintaining your epoxy garage floors with regular cleaning is essential, there are times when professional cleaning services can provide an extra level of care and precision. Professional cleaners have the expertise, equipment, and products to ensure your floors are impeccably clean and well-maintained. Here’s why opting for professional cleaning services in Broward County might be a wise decision:

  • Expertise and Experience: Professional cleaners are trained to handle various types of flooring, including epoxy. They understand the nuances of different cleaning products and techniques, ensuring that your floors receive the best possible care without the risk of damage.
  • Advanced Equipment: Professionals use specialized equipment that can effectively clean and polish your epoxy floors, reaching areas that might be difficult to address with standard household tools. This ensures a thorough cleaning that enhances the floors’ appearance and longevity.
  • Time-Saving: Hiring professionals saves you time and effort. Instead of spending your weekends scrubbing and mopping, you can rely on experts to do the job efficiently and effectively, allowing you to focus on other important tasks.
  • Customized Cleaning Plans: Professional cleaning services can tailor their approach to meet the specific needs of your floors. They can address any particular concerns you might have, such as stubborn stains or high-traffic areas that require extra attention.

  • Preventive Maintenance: Regular professional cleaning can serve as preventive maintenance, identifying and addressing potential issues before they become significant problems. This proactive approach can extend the lifespan of your epoxy floors and keep them looking their best.

If you’re looking to maintain the pristine condition of your epoxy garage floors in Broward County, consider investing in professional cleaning services. Their expertise and advanced techniques can make a noticeable difference, ensuring your floors remain a standout feature of your property.

Call Us Today for a Free Quote and let our team at Americas Industrial Coatings provide you with top-notch professional cleaning services to keep your epoxy floors in perfect condition. Visit our website at https://americasindustrialcoatings.com for more information.

 

Categories
Do It Yourself Epoxy Garage Floors Garage Design

Top Epoxy Garage Floors Maintenance Tips in Broward County

Epoxy garage floors are a popular choice among homeowners and businesses in Broward County, Florida. Known for their durability, attractive finish, and ease of maintenance, epoxy flooring solutions have become a go-to option for those looking to enhance the functionality and aesthetic of their garage spaces.

One of the most significant advantages of epoxy garage floors is their resistance to stains and chemicals. This is particularly beneficial for garages that see a lot of vehicle traffic, as oil spills and other automotive fluids can be easily wiped away without causing any damage to the flooring. Additionally, the seamless nature of epoxy floors means that there are no cracks or crevices for dirt and debris to accumulate, making them easier to clean and maintain.

Another key benefit is the customizability of epoxy floors. Homeowners can choose from a wide range of colors, patterns, and finishes to match their desired aesthetic. Whether you prefer a high-gloss finish or a more subdued matte look, epoxy flooring options can be tailored to meet your specific needs.

As you embark on your journey to install or maintain epoxy garage floors, it’s essential to partner with experienced professionals. At Americas Industrial Coatings, we offer expert installation services to ensure your floors are both stunning and long-lasting. Call Us Today for a Free Quote and transform your garage into a space you’ll love.


Why Regular Maintenance is Crucial

A well-maintained garage with a glossy epoxy floor, featuring tools, workbench, and organized shelves.

Regular maintenance of epoxy garage floors is not just about keeping them looking pristine; it is about preserving their durability and performance over the long term. In Broward County, where the climate can be quite humid, maintaining your epoxy floors is even more critical to prevent any potential damage caused by moisture.

One of the primary reasons for regular maintenance is to prevent surface wear. While epoxy floors are highly resistant to wear and tear, they are not entirely impervious. High traffic areas, in particular, can develop minor scratches and scuffs over time. Routine cleaning and occasional touch-ups can keep these minor issues from becoming significant problems.

Additionally, regular maintenance helps in identifying and addressing issues before they escalate. For instance, small cracks or chips can be repaired promptly, preventing them from growing larger and compromising the structural integrity of the floor. This proactive approach can save you from costly repairs down the line.

Maintaining your epoxy floors also involves keeping them clean and free of debris. Dirt and grit can act as abrasives, dulling the finish and causing scratches. Regular sweeping and mopping can help keep your floors in top condition. Moreover, using the right cleaning products ensures that the epoxy coating remains intact and vibrant.

In essence, regular maintenance is an investment in the longevity and appearance of your epoxy garage floors. By dedicating some time to proper care, you can ensure that your floors continue to look and perform their best for years to come.


Cleaning Tips for Epoxy Floors


Cleaning your epoxy garage floors doesn’t have to be a daunting task. With a few simple steps and the right techniques, you can keep your floors looking pristine and ensure their longevity. Here are some essential cleaning tips for epoxy floors that every Broward County resident should know:

  • Sweep Regularly: Dust and debris can accumulate quickly on epoxy floors, acting as abrasives that can damage the surface. Use a soft-bristle broom or a dust mop to sweep your floors at least once a week.
  • Spot Clean: For spills and stains, it’s important to clean them up immediately. Use a soft cloth or a mop with a gentle cleaner to wipe away any spills. Avoid using harsh chemicals, as they can damage the epoxy coating.
  • Mop Periodically: To maintain the shine and cleanliness of your epoxy floors, mop them periodically with a solution of warm water and a few drops of dish soap. Ensure that the mop is damp, not soaking wet, to avoid excess water on the floor.
  • Use the Right Cleaner: Opt for a pH-neutral cleaner specifically designed for epoxy floors. Avoid using vinegar, citrus-based cleaners, or any acidic solutions as they can dull the finish over time.
  • Rinse Thoroughly: After mopping, it’s crucial to rinse the floor with clean water to remove any soap residue. Soap residue can attract dirt and make the floor look dull.
  • Avoid Abrasive Tools: Never use steel wool, harsh scrub pads, or abrasive cleaning tools on your epoxy floors. These can scratch and damage the surface, reducing its lifespan and aesthetics.

By following these simple cleaning tips, you can keep your epoxy garage floors looking immaculate and ensure they continue to perform their best. Regular cleaning not only enhances the appearance of your floors but also helps in maintaining their durability and resistance to wear and tear.


Preventing Common Epoxy Floor Issues

A realistic image of an epoxy-coated garage floor.

One of the key aspects of maintaining epoxy garage floors is preventing common issues that could compromise their look and functionality. Here are some effective strategies to help you prevent common epoxy floor issues:

  • Control Moisture: Moisture is one of the biggest enemies of epoxy floors. Ensure your garage is well-ventilated and use a dehumidifier if necessary. Address any leaks or water seepage promptly to prevent the floor from lifting or bubbling.
  • Use Floor Mats: Placing floor mats at entry points can significantly reduce the amount of dirt and grit brought into your garage. This simple step helps in preventing scratches and abrasions on your epoxy floor.
  • Avoid Heavy Impacts: While epoxy floors are known for their durability, heavy impacts can still cause damage. Be mindful when moving heavy objects and avoid dropping tools or equipment directly onto the floor.
  • Protect from UV Exposure: Prolonged exposure to direct sunlight can cause epoxy floors to yellow and lose their shine. If your garage has windows, consider using UV-protective films or shades to minimize exposure. It’s also advisable to keep the garage door closed when not in use.
  • Regular Inspections: Periodically inspect your epoxy floors for any signs of damage such as cracks, chips, or peeling. Early detection allows for timely repairs, preventing minor issues from becoming major problems.
  • Avoid Harsh Chemicals: Certain chemicals such as gasoline, antifreeze, and harsh cleaners can damage the epoxy coating. Store these substances properly and clean up any spills immediately to protect your floor.

By taking these preventative measures, you can ensure your epoxy garage floors remain in excellent condition, providing a long-lasting and attractive surface for your garage.


Seasonal Maintenance Tips for Broward County

A realistic depiction of an epoxy-coated garage floor with a glossy, speckled finish in shades of gray and dark blue.

Living in Broward County means dealing with a unique set of weather conditions that can impact the maintenance of your epoxy garage floors. Here are some seasonal maintenance tips to help you keep your floors in top shape throughout the year:

  • Spring Cleaning: As temperatures rise, it’s a good time to give your epoxy floors a thorough cleaning. Use a soft broom or vacuum to remove any accumulated dust and debris. Follow up with a mop and a mild cleaning solution to restore the floor’s shine.
  • Summer Precautions: With the increased humidity and potential for heavy rains, ensure your garage remains well-ventilated to prevent moisture buildup. Consider using a dehumidifier to maintain optimal humidity levels and reduce the risk of mold or mildew forming on your epoxy floors.
  • Fall Preparation: As the weather begins to cool, inspect your epoxy floors for any signs of wear or damage that may have occurred over the summer. Address any issues promptly to prevent them from worsening during the cooler months. Additionally, make sure your garage is properly sealed to keep out debris and pests.
  • Winter Care: Although Broward County doesn’t experience harsh winters, cooler temperatures can still impact your garage. Ensure that any salt or chemicals used to de-ice driveways are not tracked onto your epoxy floors, as these substances can cause damage. Regularly sweep and clean the floor to maintain its appearance and durability.

By following these seasonal maintenance tips, you can ensure your epoxy garage floors remain in excellent condition year-round, despite the varying weather conditions in Broward County.


Professional Maintenance Services in Broward County

Realistic image of an epoxy-coated garage floor.

While regular maintenance can significantly extend the life of your epoxy garage floors, sometimes it’s best to leave it to the professionals. In Broward County, there are numerous expert services available to ensure your epoxy floors are always in pristine condition.

Professional maintenance services offer a range of benefits, including:

  • Deep Cleaning: Professionals use specialized equipment and cleaning solutions that penetrate deeper than regular household products, effectively removing stubborn stains and grime.
  • Repairs and Touch-Ups: If your floors have developed cracks, chips, or other forms of damage, expert technicians can perform precise repairs and touch-ups to restore the surface to its original condition.
  • Re-application of Coatings: Over time, the protective coating on your epoxy floors may wear down. Professionals can reapply these coatings, ensuring your floors remain protected against moisture, chemicals, and physical wear.
  • Inspection and Maintenance Plans: Many services offer regular inspection and maintenance plans, providing ongoing care and early detection of potential issues. This proactive approach can save you time and money in the long run.

Investing in professional maintenance services ensures your epoxy garage floors stay durable, attractive, and functional for years to come. Don’t wait for problems to arise; stay ahead of the game with expert care.

Call Us Today for a Free Quote and learn how our professional maintenance services can help you maintain the beauty and longevity of your epoxy garage floors in Broward County. Visit our website at Americas Industrial Coatings to get started.


Categories
Do It Yourself Epoxy Garage Floors Garage Design

Best Epoxy for Garage Floors: What You Need to Know!

When it comes to transforming your garage into a durable and aesthetically pleasing space, epoxy coatings are a top choice for homeowners and professionals alike. Understanding what is the best epoxy for a garage floor is crucial for achieving a finish that not only looks impressive but also withstands the test of time. Epoxy coatings provide a resilient, protective layer that can resist stains, impacts, and chemical spills, making it an ideal solution for the garage environment which often doubles as a workspace or storage area.

Choosing the right epoxy for your garage floor involves considering factors such as the floor’s current condition, the level of traffic it will endure, and the specific properties you require, such as UV resistance or slip resistance. At Americas Industrial Coatings in Fort Lauderdale, we specialize in expert epoxy floor installation, ensuring that every project meets the highest standards of quality and durability. Our professional team is equipped to guide you through the selection process to find the perfect epoxy blend that caters to your needs.

Whether you are looking to revamp your personal garage space or require a robust flooring solution for a commercial facility, we have the expertise to deliver exceptional results. Call Us Today for a Free Quote and take the first step towards a garage floor that combines functionality with style.


Evaluating Different Types of Epoxy Coatings

Realistic epoxy garage floor with a glossy finish and metallic flecks.

When selecting the best epoxy for a garage floor, it’s essential to evaluate the different types of epoxy coatings available. Each type comes with its unique set of characteristics and benefits, tailored for specific needs and environmental conditions. The most common categories include water-based, solvent-based, and 100% solid epoxies.

  • Water-Based Epoxy: This type of epoxy is user-friendly and has a lower odor and toxicity level compared to other types. It’s ideal for DIY enthusiasts due to its ease of application. However, while water-based epoxies are cost-effective, they may not be as durable as other options.
  • Solvent-Based Epoxy: More potent than its water-based counterpart, solvent-based epoxies offer a thicker coating and are often used for industrial purposes. They can provide a more durable finish but come with a strong odor and require careful handling due to the solvents present.
  • 100% Solids Epoxy: This type is the most durable and is commonly used in professional installations. It contains no solvents, making it thicker and providing a high-build protective coating that can withstand heavy traffic and severe impacts. It comes with a higher price tag but offers the best long-term value.

Understanding the properties of these epoxies is critical in determining the best choice for your garage floor. Factors such as the floor’s exposure to chemicals, heavy machinery, and temperature fluctuations should be taken into account. While DIY options can be tempting, professional-grade epoxies applied by experienced technicians, like those at Americas Industrial Coatings, ensure a superior finish and longevity.


Top Benefits of Epoxy Floors in Your Garage

Realistic image of an epoxy coated garage floor with a glossy finish.

The application of epoxy on garage floors offers a multitude of benefits, making it a popular choice for homeowners and businesses alike. One of the primary advantages is its durability. Epoxy coatings are known for their resilience and are capable of withstanding the rigors of daily garage activities, including heavy foot traffic and vehicle movements.

Another significant benefit is ease of maintenance. The seamless surface created by epoxy is impervious to oil stains and water, which allows for easy cleaning. A simple mop or broom is often all that’s required to keep an epoxy floor looking pristine. Furthermore, epoxy floors are highly resistant to wear and tear, significantly reducing the need for frequent repairs or resurfacing.

Epoxy also elevates the aesthetics of a garage space. With a wide range of colors and finishes available, including metallic and flake designs, homeowners have the flexibility to customize their space to their liking. The glossy finish of epoxy can also improve lighting conditions by reflecting light, enhancing visibility and contributing to a safer environment.

In terms of safety, epoxy floors provide improved traction and slip resistance, reducing the risk of accidents. This is particularly important in a garage setting where spills and slick surfaces are common. Additionally, epoxy coatings can be formulated to be resistant to fire and heat, providing an added layer of protection for the garage and its contents.

Considering these benefits, it’s clear why epoxy flooring is a favored choice for those looking to upgrade their garage. Its combination of functionality, durability, and visual appeal make it an excellent investment for any property.


Essential Factors to Consider When Choosing Epoxy

Glossy epoxy garage floor coating

Selecting the right epoxy for your garage floor is crucial to achieving the desired performance and aesthetics. One key factor to consider is the epoxy’s formulation. There are various types of epoxy resins available, each with its own set of properties. Water-based epoxies are user-friendly and easy to apply but may not offer the same level of durability as solvent-based or 100% solids epoxies, which can provide a thicker, more protective coating.

Another essential factor is the chemical composition of the epoxy. Some formulations are designed to resist specific chemicals, such as oil, gasoline, and household chemicals, making them ideal for garage floors that will be exposed to these substances regularly.

The installation process also matters. Professional application ensures proper adhesion and longevity of the epoxy coating. It’s important to assess the condition of your concrete floor and make any necessary repairs before applying epoxy, as cracks and uneven surfaces can affect the final result.

UV stability is another consideration, especially for garages with exposure to sunlight. Some epoxies can yellow or degrade when exposed to UV light, so if your garage gets a lot of sun, look for UV-resistant options.

Lastly, consider the aesthetic options available. While the protective qualities of epoxy are paramount, the color and finish will impact the overall look of your garage. Epoxy coatings come in a wide range of colors and can include additives like color flakes to create different textures and designs.

By carefully weighing these factors, you can ensure that you choose an epoxy coating that not only looks great but also stands the test of time, providing a durable, long-lasting surface for your garage floor.


Professional Epoxy Installation vs. DIY Approach

Realistic representation of a glossy epoxy coated garage floor.

When it comes to applying an epoxy coating to your garage floor, you have two main options: hiring a professional or attempting the job yourself. A DIY approach may seem cost-effective at first glance, but it’s important to consider the complexity of the process. Proper application requires thorough surface preparation, which often includes concrete repair, cleaning, and priming. Without the right tools and experience, achieving a smooth, even coating can be challenging. Additionally, DIY kits may not have the same quality or durability as the commercial-grade products used by professionals.

On the other hand, a professional installation ensures that the job is done right the first time. Expert installers bring years of experience and use advanced techniques to prepare the floor, apply the epoxy evenly, and ensure proper curing. This results in a more durable and long-lasting finish. Professionals also have access to higher-quality materials that may not be available in DIY kits, offering better protection against spills, stains, and wear.

Moreover, hiring a professional can actually be more cost-effective in the long run. An improperly applied epoxy coating can peel, crack, or deteriorate prematurely, leading to the need for repairs or a complete do-over. A professional installation comes with the assurance that the job is backed by both product and service guarantees.

In summary, while the DIY route might be tempting for those looking to save money, the benefits of a professional epoxy installation—durability, quality, and peace of mind—often outweigh the initial cost savings. Before making a decision, weigh the pros and cons of each approach carefully, considering the long-term impact on your garage floor.


Maintaining Your Epoxy Garage Floor for Longevity

Once your epoxy garage floor is expertly installed, maintaining it properly is key to ensuring its longevity and keeping it looking like new. Regular maintenance not only prolongs the life of the floor but also preserves its aesthetic appeal. The first step in maintenance is routine cleaning; simply sweeping away debris and wiping up spills promptly can prevent stains and scratches. For deeper cleaning, a mild soap and water solution can be used to remove any buildup without damaging the epoxy coating.

It’s also essential to protect the floor from potential damage. Although epoxy is known for its durability and resistance to chemicals, it can still be susceptible to scratches from heavy machinery or sharp objects. Placing mats in high-traffic areas and using protective pads under heavy equipment can help reduce wear and tear. Additionally, it’s advisable to avoid using harsh chemicals or abrasive cleaners that could erode the epoxy surface.

For those inevitable minor scratches or wear spots, Americas Industrial Coatings offers repair services to touch up and restore your floor to its original glory. Regular inspections can catch these issues early before they become more significant problems, ensuring your floor remains in top condition for years to come.

Remember that professional help is just a call away for any maintenance or repair needs. Call Us Today for a Free Quote and learn how Americas Industrial Coatings can assist you in keeping your epoxy garage floor in pristine condition. For more information, visit americasindustrialcoatings.com.


Categories
About Epoxy Floors Do It Yourself Garage Design

Epoxy Garage Floors: How Hard Is It to DIY?

Embarking on a do-it-yourself epoxy garage floor project requires a fundamental understanding of what epoxy coating entails. Epoxy is a thermosetting resin that, when mixed with a polyamine hardener, forms a robust and durable surface. It’s known for its resilience and ability to withstand the daily wear and tear of garage activities. However, how hard is it to epoxy a garage floor on your own?

Firstly, the process begins with the thorough preparation of the concrete floor. This involves cleaning, repairing any cracks or damage, and ensuring the surface is level. Next, the application of the epoxy requires precision; the two components must be mixed accurately to trigger the curing process. Once mixed, the epoxy has a limited workable time before it begins to harden. During application, achieving a smooth, even layer is crucial for both appearance and performance.

DIY enthusiasts must also be mindful of factors such as temperature and humidity, which can significantly affect the curing process. In addition, proper ventilation is essential to safeguard against fumes. While the steps may seem straightforward, the execution demands attention to detail and a steady hand.

If you’re contemplating a DIY epoxy installation, consider the benefits of professional expertise. “Call Us Today for a Free Quote”, and let Americas Industrial Coatings in Fort Lauderdale provide you with a flawless and enduring epoxy floor in Broward County, Florida. Our seasoned team ensures that every step of the installation process is handled with precision, delivering superb results that stand the test of time.

Evaluating the Difficulty Level of DIY Epoxy Floors

When assessing the difficulty level of applying an epoxy coating to a garage floor by oneself, several aspects must be taken into consideration. The process is not just about mixing and pouring; it entails a series of steps that require precision and patience. For the untrained DIYer, the difficulty can range from moderate to challenging, depending on the floor’s current condition and the individual’s technical skills.

Surface preparation is paramount and often the most labor-intensive part of the process. It involves degreasing the floor, filling in cracks, and sanding to create a profile for the epoxy to bond effectively. In addition, environmental conditions play a significant role; temperatures must be within certain limits for the epoxy to set correctly, and humidity must be low to prevent blushing and improper curing.

Applying the epoxy itself requires a swift yet careful approach to ensure it spreads evenly before it starts to set. Another consideration is the waiting time between coats, which adds to the project duration. Timing is critical, as is the choice of materials and tools, which can impact the final outcome.

For those with a knack for hands-on work and a meticulous nature, DIY epoxy flooring is an attainable project. However, it is important to recognize that achieving a professional-looking finish may be more complex than it appears. It involves not just the application of the coating, but also knowledge of the materials and an understanding of the chemical processes at play.

Tools and Materials Needed for Epoxy Installation

Realistic image of a high-gloss, seamless epoxied garage floor similar to the provided reference.

Embarking on a DIY epoxy floor installation requires gathering the right tools and materials before beginning the project. Essential to success are quality supplies that will help ensure a smooth application and durable finish. Starting with the basics, one will need a high-quality epoxy resin and hardener kit. These typically come with instructions for the correct mixing ratios to achieve the best results.

Preparation tools include a floor grinder or etcher to clean and profile the concrete, a shop vacuum for dust removal, and concrete filler for patching up any cracks or holes. Safety gear is a must and should include gloves, goggles, and a respirator mask to protect against fumes and dust.

For the application process, the following tools are indispensable:

  • A squeegee or notched trowel to spread the epoxy evenly across the surface.
  • Rollers and brushes designed for use with epoxy, to help in covering the floor and edges neatly.
  • Spiked shoes which allow one to walk over the wet epoxy to pop any air bubbles and assist in the application.
  • A mixing paddle attached to a drill, for thorough blending of the resin and hardener.

Moreover, one should also consider the aesthetic finish of the floor. For those desiring a decorative touch, color flakes or pigments can be added to the mixture. Finally, a topcoat sealer is highly recommended to provide additional protection and a glossy finish, enhancing the floor’s appearance and extending its lifespan.

Step-by-Step Guide to Applying Epoxy on Garage Floors

A realistic image of a shiny epoxy garage floor in a well-organized garage.

Applying epoxy to garage floors is a multi-step process that requires attention to detail and patience. The first step involves thorough surface preparation, which is crucial for ensuring the epoxy adheres properly. This involves cleaning the garage floor to remove any grease, oil, or existing coatings. Any cracks or imperfections should be repaired using concrete filler.

After the floor is prepared, the next step is to mix the epoxy resin and hardener. It’s vital to follow the manufacturer’s instructions precisely for the correct ratio and mixing time to prevent any issues with the curing process.

Once the epoxy mixture is ready, begin applying the epoxy to the floor starting at the farthest corner of the garage. Use a squeegee or notched trowel to spread the epoxy in a thin, even layer. Make sure to work in manageable sections to maintain a wet edge, which helps to avoid visible seams in the final finish.

After spreading the epoxy, use a roller to smooth out the surface and ensure even coverage. For best results, roll in both vertical and horizontal directions. If you’re adding color flakes or decorative elements, now is the time to sprinkle them over the wet epoxy before it begins to set.

Allow the first coat of epoxy to cure as per the recommended time, which may vary based on the product and environmental conditions. If a second coat is desired or required, repeat the application process ensuring the previous layer has had adequate time to harden.

The final step is to apply a topcoat sealer, which will protect the epoxy surface and add a glossy finish. Once the topcoat is applied, it’s important to wait for the recommended curing time before using the garage to prevent any damage to the new floor.

Throughout the process, maintain a well-ventilated space and adhere to safety guidelines by wearing appropriate protective gear. By following these steps meticulously, you can achieve a professional and durable epoxy garage floor.

Common Challenges and Mistakes in Epoxy Application

A realistic epoxy-coated garage floor with a glossy finish and subtle textures.

Applying epoxy to a garage floor, while a feasible DIY project, presents several challenges and common mistakes that can affect the quality and longevity of the finished surface. One of the primary difficulties encountered is inadequate floor preparation. Ensuring the concrete is clean, dry, and free of any previous coatings or sealants is essential, as any contaminants can prevent the epoxy from bonding correctly.

Another frequent issue is improper mixing of the epoxy components. An incorrect ratio of resin to hardener can lead to a floor that does not cure properly, which may result in a tacky surface or uneven hardening. Additionally, applying the epoxy in temperatures outside the recommended range can also cause curing problems. Too cold, and the epoxy will take much longer to cure; too hot, and it may cure too quickly, making it difficult to work with.

Humidity is another factor that can introduce complications. High levels of moisture in the air can cause the epoxy to blush, creating a cloudy or milky appearance on the surface. Ventilation is crucial not only for allowing the epoxy to cure correctly but also for the safety of the person applying it, as the fumes can be hazardous.

Another pitfall is applying too thick a layer of epoxy in a single coat, which can lead to air bubbles and an uneven surface. It’s better to apply multiple thin coats than to attempt one thick coat. Lastly, failing to wait long enough between coats or before using the newly coated floor can result in a floor that is not fully cured and may be more prone to scratches and other damage.

By being aware of these common challenges and mistakes, DIY enthusiasts can take proactive steps to avoid them and ensure a successful epoxy garage floor installation.

Professional vs. DIY Epoxy Garage Floors: Making the Right Choice

Realistic image of a high-gloss, epoxy coated garage floor with a smooth blend of neutral colors and natural lighting.

When considering how hard it is to epoxy a garage floor, one must weigh the benefits of a DIY approach against hiring professionals. DIY can be cost-effective and offers a sense of accomplishment, but it comes with the risk of potential errors that can compromise the floor’s durability and appearance. On the other hand, professional installation by experts like Americas Industrial Coatings ensures a high-quality finish, with technicians who are well-versed in overcoming the challenges associated with epoxy application.

Professionals bring advanced equipment, such as diamond grinders for surface preparation and specialized tools for consistent application. They are also equipped to handle unforeseen issues, like moisture problems or concrete repairs, which might not be within the skill set of the average DIYer. Additionally, the peace of mind that comes with warranties and the assurance of a job well done can make the investment in professional services worthwhile.

Consider the longevity of the floor, the time investment required for a DIY project, and the potential cost of errors when deciding. While DIY kits are available, they often lack the quality and durability of the commercial-grade products used by professionals. The expertise that comes with professional installation often leads to a superior, longer-lasting finish.

If you’re in Broward County, Florida, and are considering an epoxy garage floor, weigh these considerations carefully. For those who decide that professional quality is paramount, Call Us Today for a Free Quote at Americas Industrial Coatings, and ensure your garage floor is as resilient and impressive as possible.

Categories
About Epoxy Floors Do It Yourself Garage Design

Ultimate Guide: Garage Floor Preparation for Painting

Welcome to the comprehensive guide to garage floor preparation for painting, an essential step in transforming your garage into a clean, durable, and aesthetically pleasing space. At Americas Industrial Coatings, we understand that a successful coating application begins well before the paint touches the floor. Proper preparation is the key to ensuring that the epoxy coating adheres correctly and provides a lasting finish.

Garage floor painting is not merely about applying a new color; it’s about creating a protective barrier that withstands the daily rigors of vehicle traffic, oil spills, and other common garage hazards. That’s why the preparation process involves a series of crucial steps, from cleaning and repairing, to etching and priming the concrete surface. Our expert team in Fort Lauderdale is dedicated to delivering a meticulous installation process for homeowners across Broward County, Florida.

Whether you’re looking to renovate your residential garage or upgrade a commercial facility, understanding the importance of garage floor preparation for painting is the first step towards a successful project. If you’re ready to take the next step, Call Us Today for a Free Quote and ensure your garage floor receives the expert attention it deserves.


Significance of Proper Garage Floor Preparation

Epoxy coated garage floor with glossy sheen and textural details.

The foundation of a durable and visually appealing garage floor coating lies in the significance of proper garage floor preparation. This critical step cannot be overlooked, as it ensures the coating adheres securely and performs as intended. A well-prepared surface can prevent a multitude of issues such as peeling, cracking, and moisture damage that can compromise the integrity of the floor.

Preparation involves thorough cleaning to remove any contaminants, such as oil, grease, or existing paint, which may hinder the adhesion of the new coating. It also includes repairing cracks and chips in the concrete to create a smooth, uniform surface. Another vital component is profiling the garage floor through mechanical means, like grinding or acid etching, to open up the pores of the concrete. This process allows the epoxy or paint to penetrate deeply and bond effectively with the substrate.

Skipping or rushing through the preparation steps can lead to premature failure of the floor coating. As a result, it is crucial for homeowners and business owners alike to recognize the importance of investing time and effort into proper garage floor preparation. It is the bedrock upon which a resilient and long-lasting floor coating is built, safeguarding your investment for years to come.


Evaluating Your Garage Floor Condition

Before initiating any garage floor preparation for painting, it is crucial to evaluate the current condition of your garage floor. This assessment will guide you in determining the necessary preparation steps and the extent of the work required. Begin by inspecting the surface for any visible signs of damage such as cracks, chips, or spalling that may need repair. It is also important to look for any stains or areas affected by oil, chemicals, or other substances that could impair the adhesion of the new coat.

Another important aspect to consider is moisture levels in the concrete. Conducting a simple moisture test can reveal if there are any underlying issues that need to be addressed before applying a coating. High moisture levels can lead to a compromised bond and potential coating failure.

Furthermore, consider the age of the concrete. Newly laid concrete typically requires a curing period before any coatings can be applied. Older concrete floors may have layers of previous coatings or sealants that will need to be removed to ensure a clean surface that will allow the new coating to bond properly.

In summary, a thorough examination of your garage floor’s condition will provide a clear picture of the preparation steps required to achieve a successful and long-lasting finish. It is an essential part of the process that guarantees the best possible results for your epoxy floor installation.


Cleaning and Degreasing Your Garage Floor

Realistic image of a glossy epoxy-coated garage floor with detailed textures.

Once you have assessed the condition of your garage floor, the next step in garage floor preparation for painting is to ensure the surface is meticulously cleaned and free of contaminants. Cleaning and degreasing are vital to remove any substances that could prevent the epoxy coating from adhering properly. Start with sweeping or vacuuming the floor to eliminate dust, dirt, and debris. Then, apply a degreaser to the surface, focusing on areas with oil or grease stains.

For thorough cleaning, use a stiff-bristled brush or a scrubbing machine to work the degreaser into the floor. This mechanical action helps to lift and dissolve stubborn contaminants. After scrubbing, rinse the floor thoroughly with water, ensuring all degreaser and loosened dirt is washed away. Allow the floor to dry completely, as any remaining moisture can affect the adhesion of the epoxy coating.

If you encounter any persistent stains that are not removed by standard degreasing, consider using a specialized concrete cleaner or etching the surface with a mild acid solution, followed by neutralization and rinsing. It’s important to take safety precautions, such as wearing protective gear, when handling chemicals during this process.

Cleaning and degreasing are critical stages that set the foundation for a durable and visually appealing epoxy floor. Skipping these steps or executing them poorly can lead to a suboptimal finish, making it essential to dedicate sufficient time and effort to achieve a clean, degreased surface ready for coating.


Repairing Cracks and Damage Before Painting

An image of a shiny, smooth, professionally done epoxy garage floor with realistic reflections and glossy finish.

After the cleaning and degreasing phase, inspect the garage floor for any cracks or damage that could undermine the integrity and appearance of your new epoxy coating. Repairing cracks and damage before painting is a crucial step to ensure a smooth, professional finish. Begin by identifying all the imperfections, including cracks, chips, and spalling areas on the concrete surface.

To address these issues, use a concrete repair product designed for filling cracks and holes. Apply the filler according to the manufacturer’s instructions, and be sure to press it firmly into the cracks to ensure a good bond. Larger cracks may require the use of a concrete patching compound. Once applied, smooth the patch with a trowel to level it with the rest of the floor surface. Allow the repair material to cure as directed, which may take anywhere from a few hours to overnight.

For the best results, sand down the repaired areas to create a uniform surface that will not be noticeable once the epoxy coating is applied. It’s essential to remove any excess repair material and ensure that the floor is as flat and even as possible. This step not only contributes to the aesthetics of the final product but also prevents future cracking and damage by creating a stronger, more cohesive surface.

Remember, taking the time to properly repair your garage floor before painting is an investment in the longevity and durability of your flooring. A well-prepared surface will allow the epoxy to adhere better and last longer, providing you with a garage floor that is not only beautiful but also resistant to the wear and tear of everyday use.


Applying the Primer: The First Step to a Lasting Finish

Realistic image of a garage floor being prepared for epoxy application, with detailed concrete texture and equipment.

With all repairs complete, the next phase of garage floor preparation for painting is applying a primer, which is the foundation for a durable and lasting finish. The primer serves several important functions; it helps to seal the concrete, reduce the chances of hot tire pick-up, and ensures better adhesion of the epoxy coating. Before beginning, ensure the floor is free from dust and debris from the repair work.

Choose a high-quality epoxy primer that is compatible with your epoxy paint. Mix the primer according to the manufacturer’s directions, often requiring a precise ratio of resin to hardener. Apply the primer with a roller, starting at the farthest corner of the garage and working your way towards the exit. It is important to apply a thin, even layer to avoid creating uneven thicknesses that could result in a poor finish.

Allow the primer to dry as per the product’s specifications before moving on to the next step. The drying time is critical to achieving a strong bond between the primer and the epoxy coating. Once the primer is dry to the touch and no longer tacky, your floor is ready for the final coating. This step is essential in creating a robust and resilient epoxy floor that can withstand the demanding conditions of a garage environment.

If you’re eager to start your epoxy floor installation in Broward County, Florida, and want it done right the first time, Call Us Today for a Free Quote. Our team at Americas Industrial Coatings in Fort Lauderdale is equipped with the expertise to ensure your garage floor is prepped and painted to perfection.


Call Now Button